Download: KeyShieldSSO-NAM_integration.pdf
Date: 11/3/2014
Version: 1.0.4
Tags: system integrator documentation

 Click Next to properties page. Here you must add at least a kshieldUrl property. It’s value has to be a complete link to your KeyShieldSSO server. For example http://172.22.78.101:8485 or https://172.22.78.101:8486 for SSL connection (not required inside the server room).
If you need to use more then one user stores or the KeyShield SSO server is using more then one LDAP sources, you have to map them to each other. Each store has to be mapped by a separate property. The name of the property is constructed by user_store_name .connectorID. The value of the property has to be the respective KeyShield SSO server connector name (visit the configuration page of the KeyShield SSO web management console for a list of connectors and their names).
If the user is not authenticated to the KeyShield SSO server, SSO authentication fails. The control is then passed to the PasswordClass authentication class by default. If you need to fall back to different class, you can define a fallbackClass property. It’s value is a name of existing authentication class, which is requested to be used if the SSO authentication fails.
Now confirm creation of the new authentication class and it appears in the list – see the screen shot below.
Click Next to properties page. Here you must add at least a kshieldUrl property. It’s value has to be a complete link to your KeyShieldSSO server. For example http://172.22.78.101:8485 or https://172.22.78.101:8486 for SSL connection (not required inside the server room).
If you need to use more then one user stores or the KeyShield SSO server is using more then one LDAP sources, you have to map them to each other. Each store has to be mapped by a separate property. The name of the property is constructed by user_store_name .connectorID. The value of the property has to be the respective KeyShield SSO server connector name (visit the configuration page of the KeyShield SSO web management console for a list of connectors and their names).
If the user is not authenticated to the KeyShield SSO server, SSO authentication fails. The control is then passed to the PasswordClass authentication class by default. If you need to fall back to different class, you can define a fallbackClass property. It’s value is a name of existing authentication class, which is requested to be used if the SSO authentication fails.
Now confirm creation of the new authentication class and it appears in the list – see the screen shot below.
 Now confirm creation of the new authentication method and it appears in the list – see the screen shot below.
 For a proper function of the Authentication contract, authentication card must be configured incl. A picture. Please use Customizable and it’s picture or upload whatever you want.
 Now confirm creation of the new authentication contract and it appears in the list – see the screen shot below.
Introduction
KeyShield SSO authenticates not only a browser session but the user’s device at all. All widely used platforms are supported, visit Clients & Authentication section for detailed information. Once the NAM is connected to the KeyShield SSO, no further browser session authentication is required. This is perfect for all desktop users who are authenticating every morning to eDirectory or Active Directory. Mobile users can profit from KeyShield SSO integration as well, because they don’t need to type their username and password on the touch screen keyboard. At iOS device for example, the username and password can be stored in so called keychain. Then they can start the KeyShield SSO client and start using the browser. That’s it.Installation steps
1. Install integration module
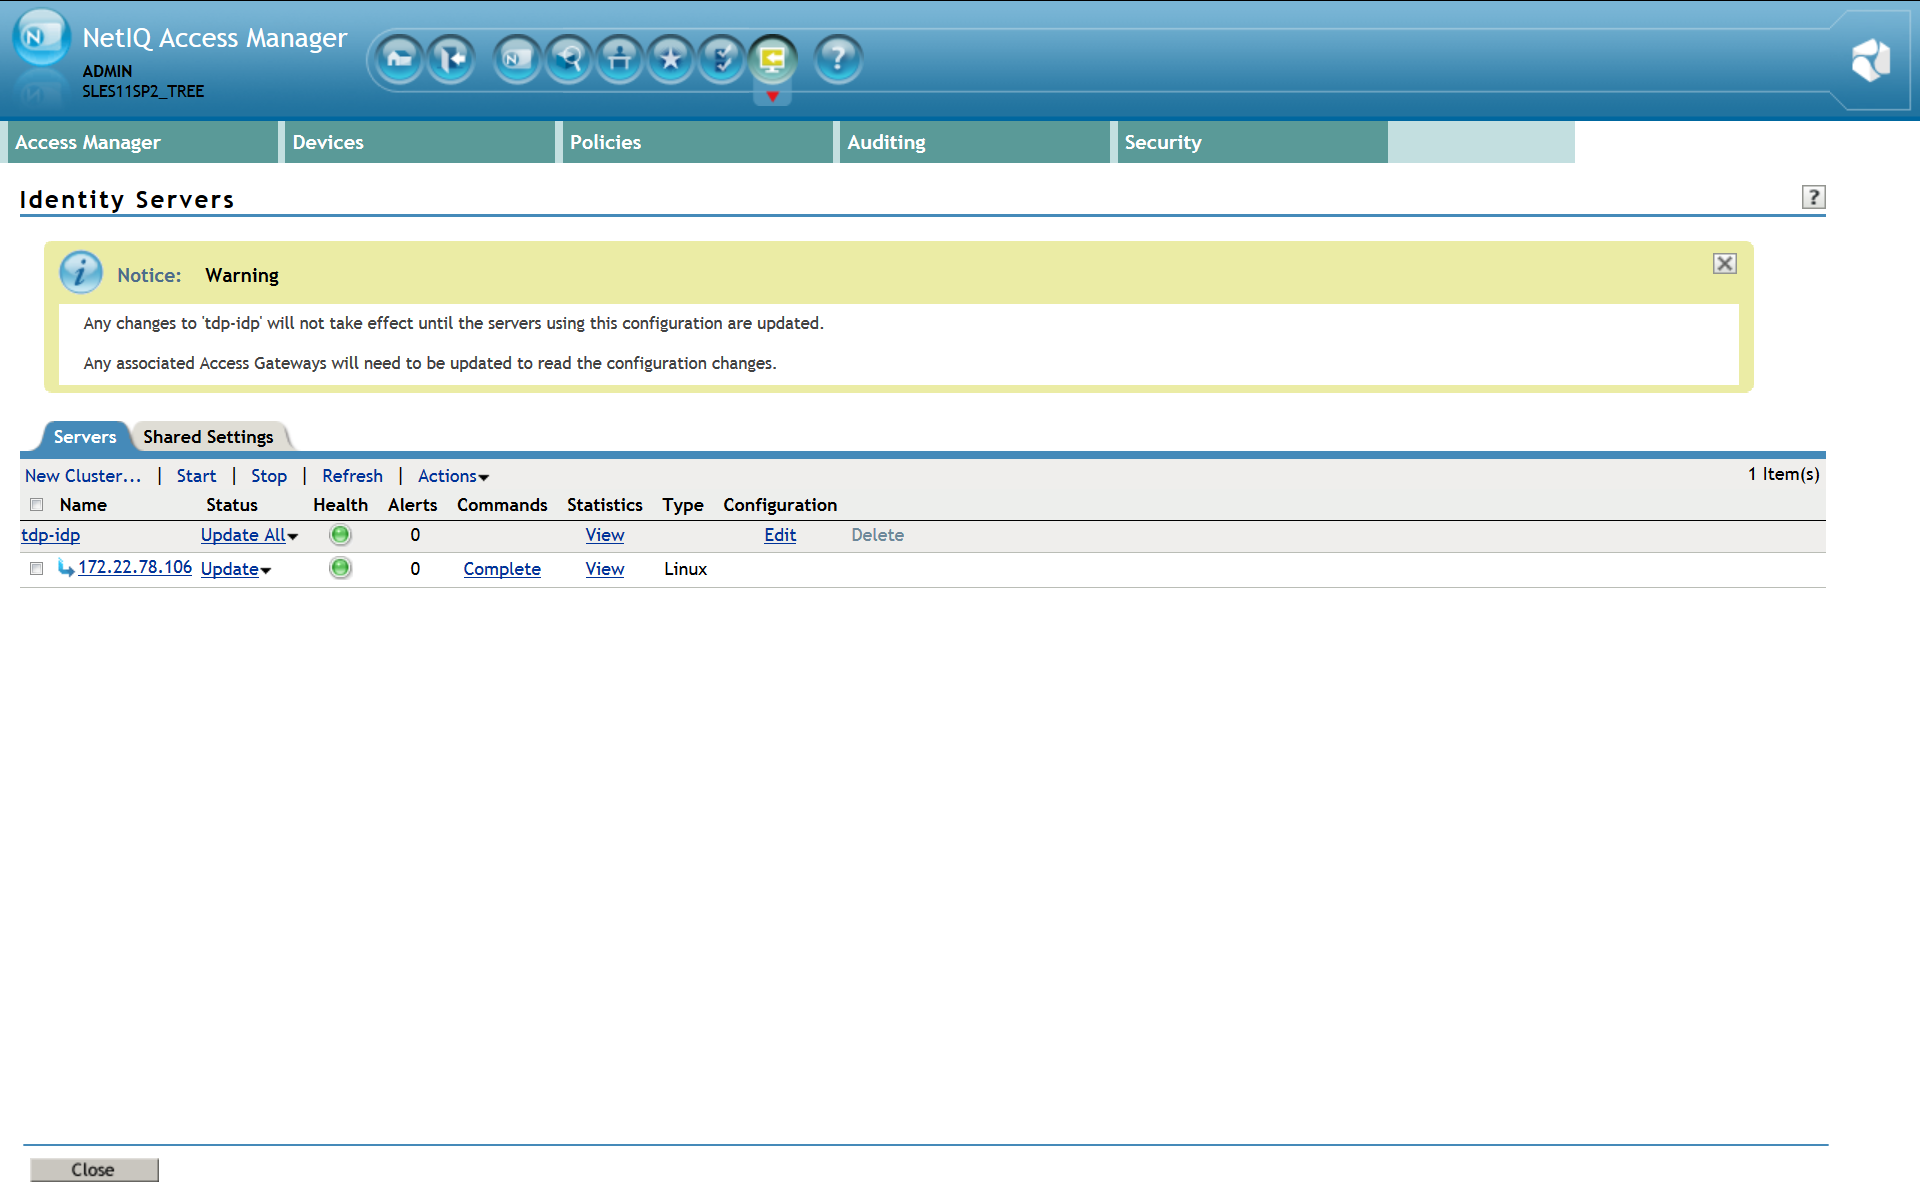
First of all, you need a configured and running NAM with at least one LDAP user source. See the screenshot below for reference. In this case we have 2 different user sources (LDAP directories). The integration package consist of few libraries, which has to be installed into the NAM LIB directory at the NAM server. We provide a comfortable installation script inst_kshield-netiq_1.0.1.bin which is available for download at Downloads. This script does NO changes to NAM, it just stores required libraries into the LIB directory and sets necessary access rights to them. Once you are done with libraries installation, you can start configuring SSO authentication for NAM. List of 2 configured user stores:
2. Define authentication class
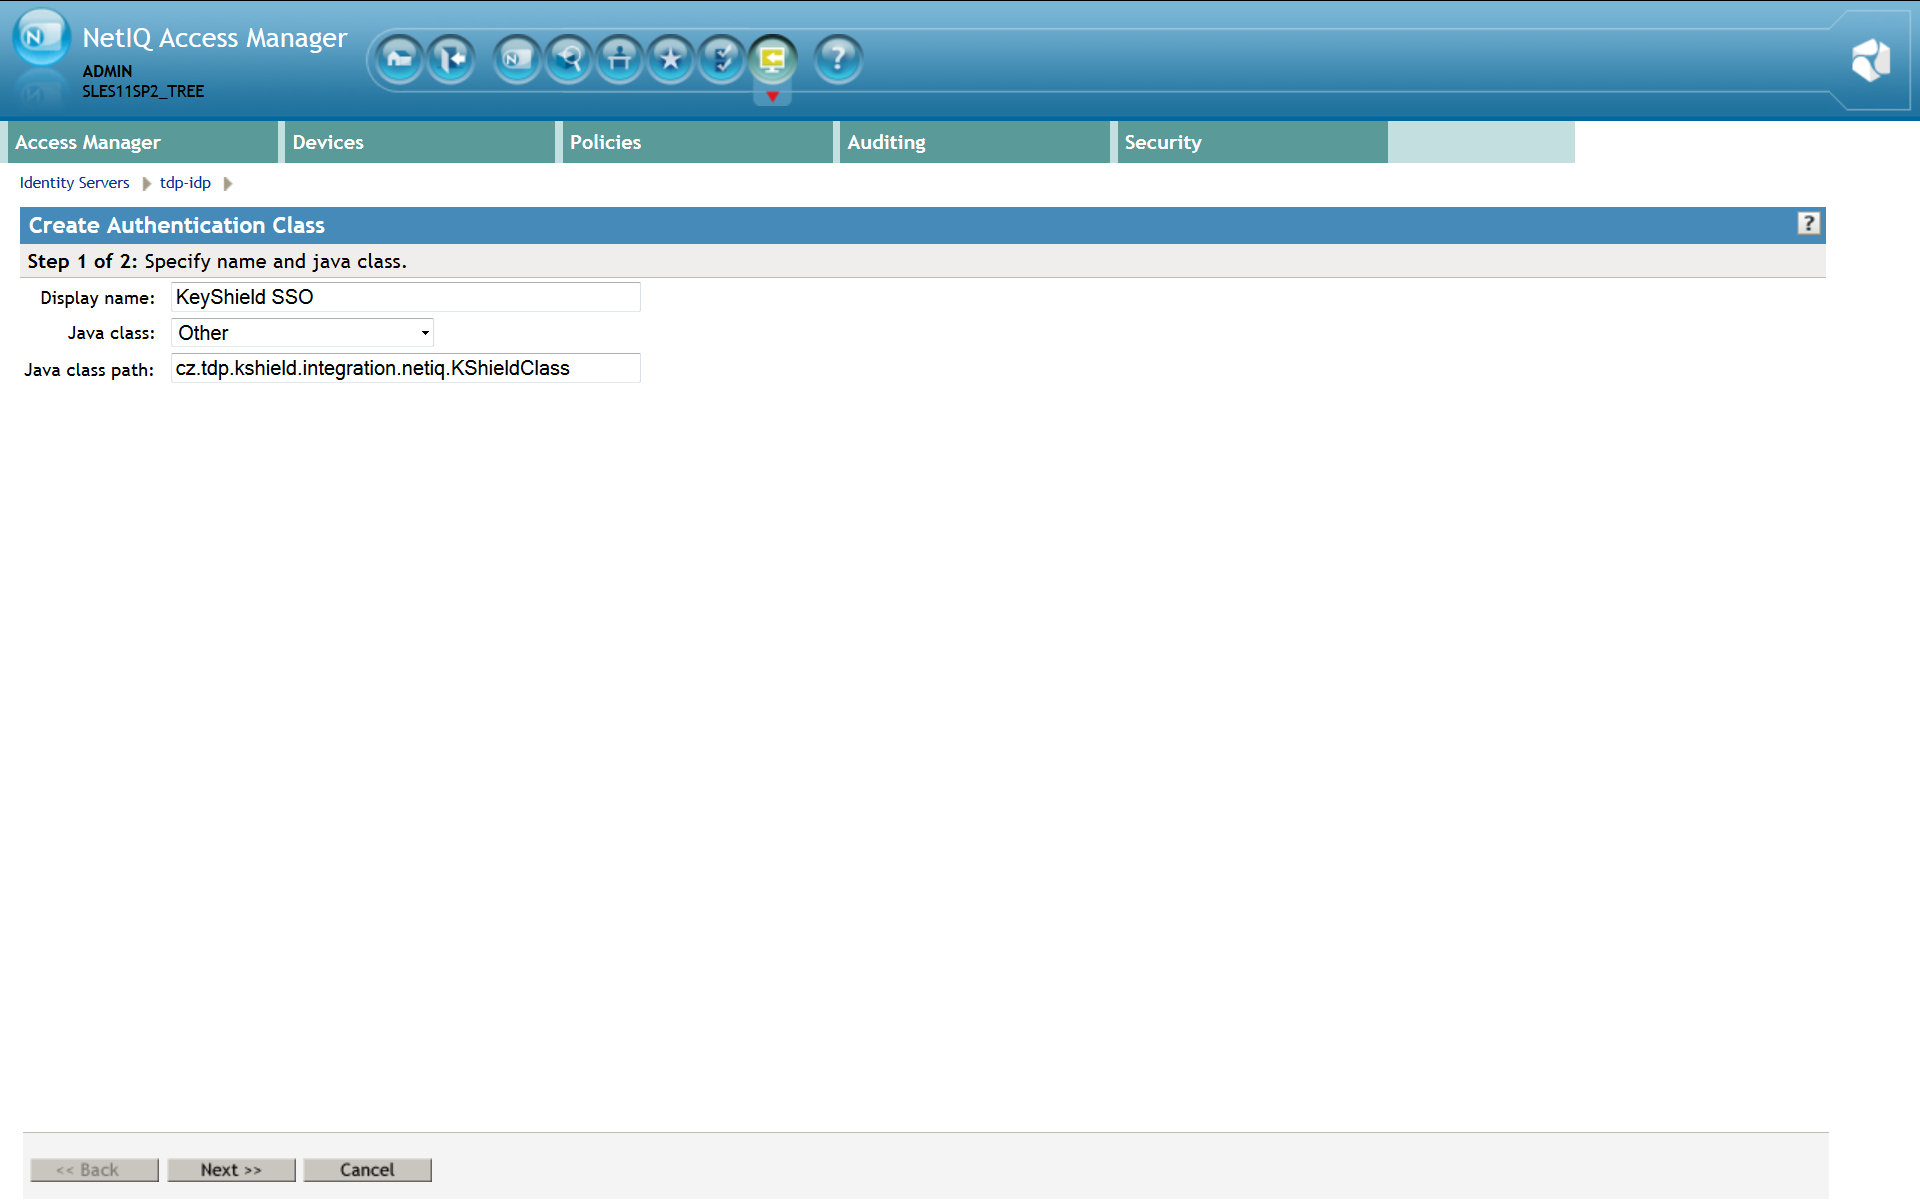
Please note: For detailed description refer to the Identity Server Guide section 3.2 Creating Authentication Classes. You need to create a new Authentication Class first. Use whatever Display Name you prefer, easy and descriptive one is recommended. The Java class property value must be set to Other and Java class path to cz.tdp.kshield.integration.netiq.KShieldClass (see the screen shot below)
Click Next to properties page. Here you must add at least a kshieldUrl property. It’s value has to be a complete link to your KeyShieldSSO server. For example http://172.22.78.101:8485 or https://172.22.78.101:8486 for SSL connection (not required inside the server room).
If you need to use more then one user stores or the KeyShield SSO server is using more then one LDAP sources, you have to map them to each other. Each store has to be mapped by a separate property. The name of the property is constructed by user_store_name .connectorID. The value of the property has to be the respective KeyShield SSO server connector name (visit the configuration page of the KeyShield SSO web management console for a list of connectors and their names).
If the user is not authenticated to the KeyShield SSO server, SSO authentication fails. The control is then passed to the PasswordClass authentication class by default. If you need to fall back to different class, you can define a fallbackClass property. It’s value is a name of existing authentication class, which is requested to be used if the SSO authentication fails.
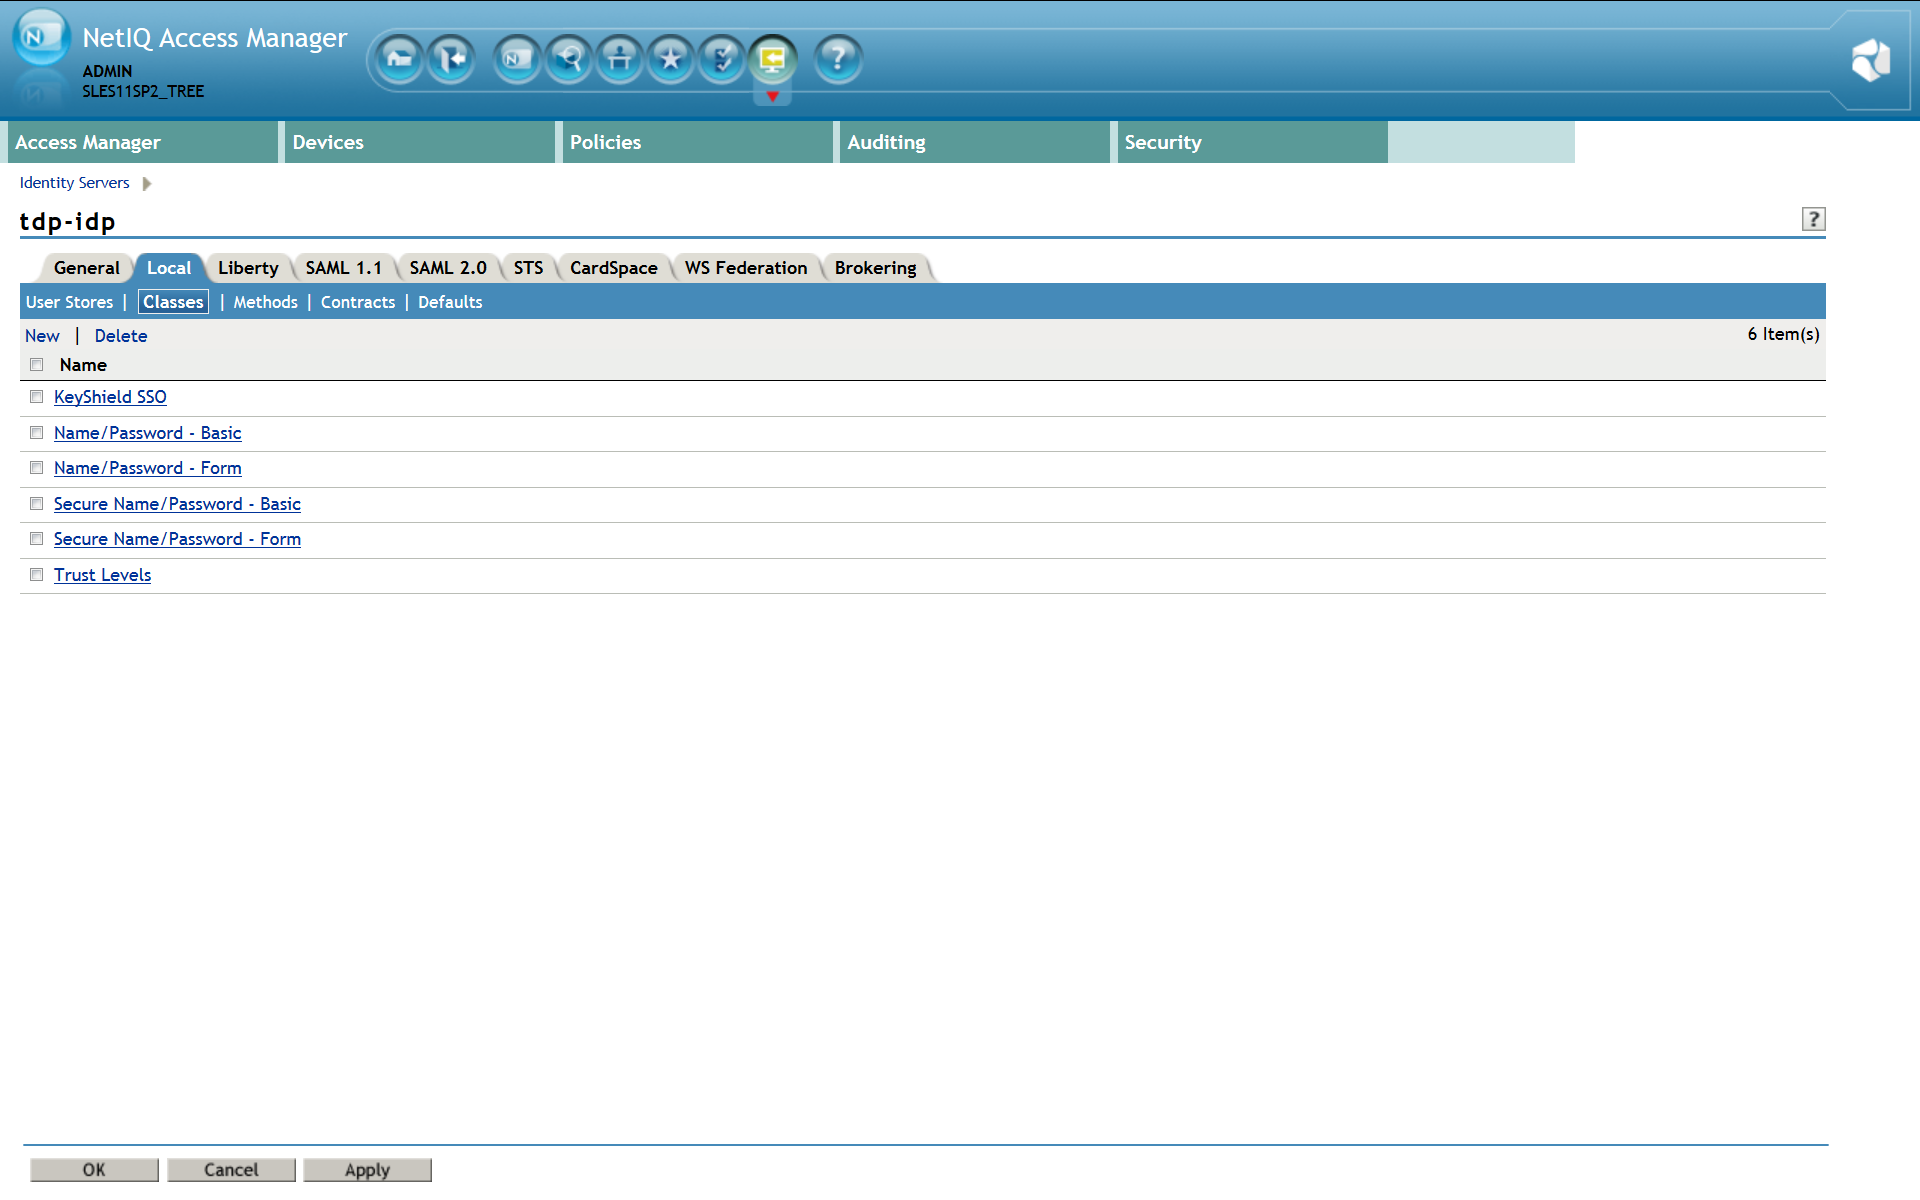
Now confirm creation of the new authentication class and it appears in the list – see the screen shot below.
3. Define authentication method
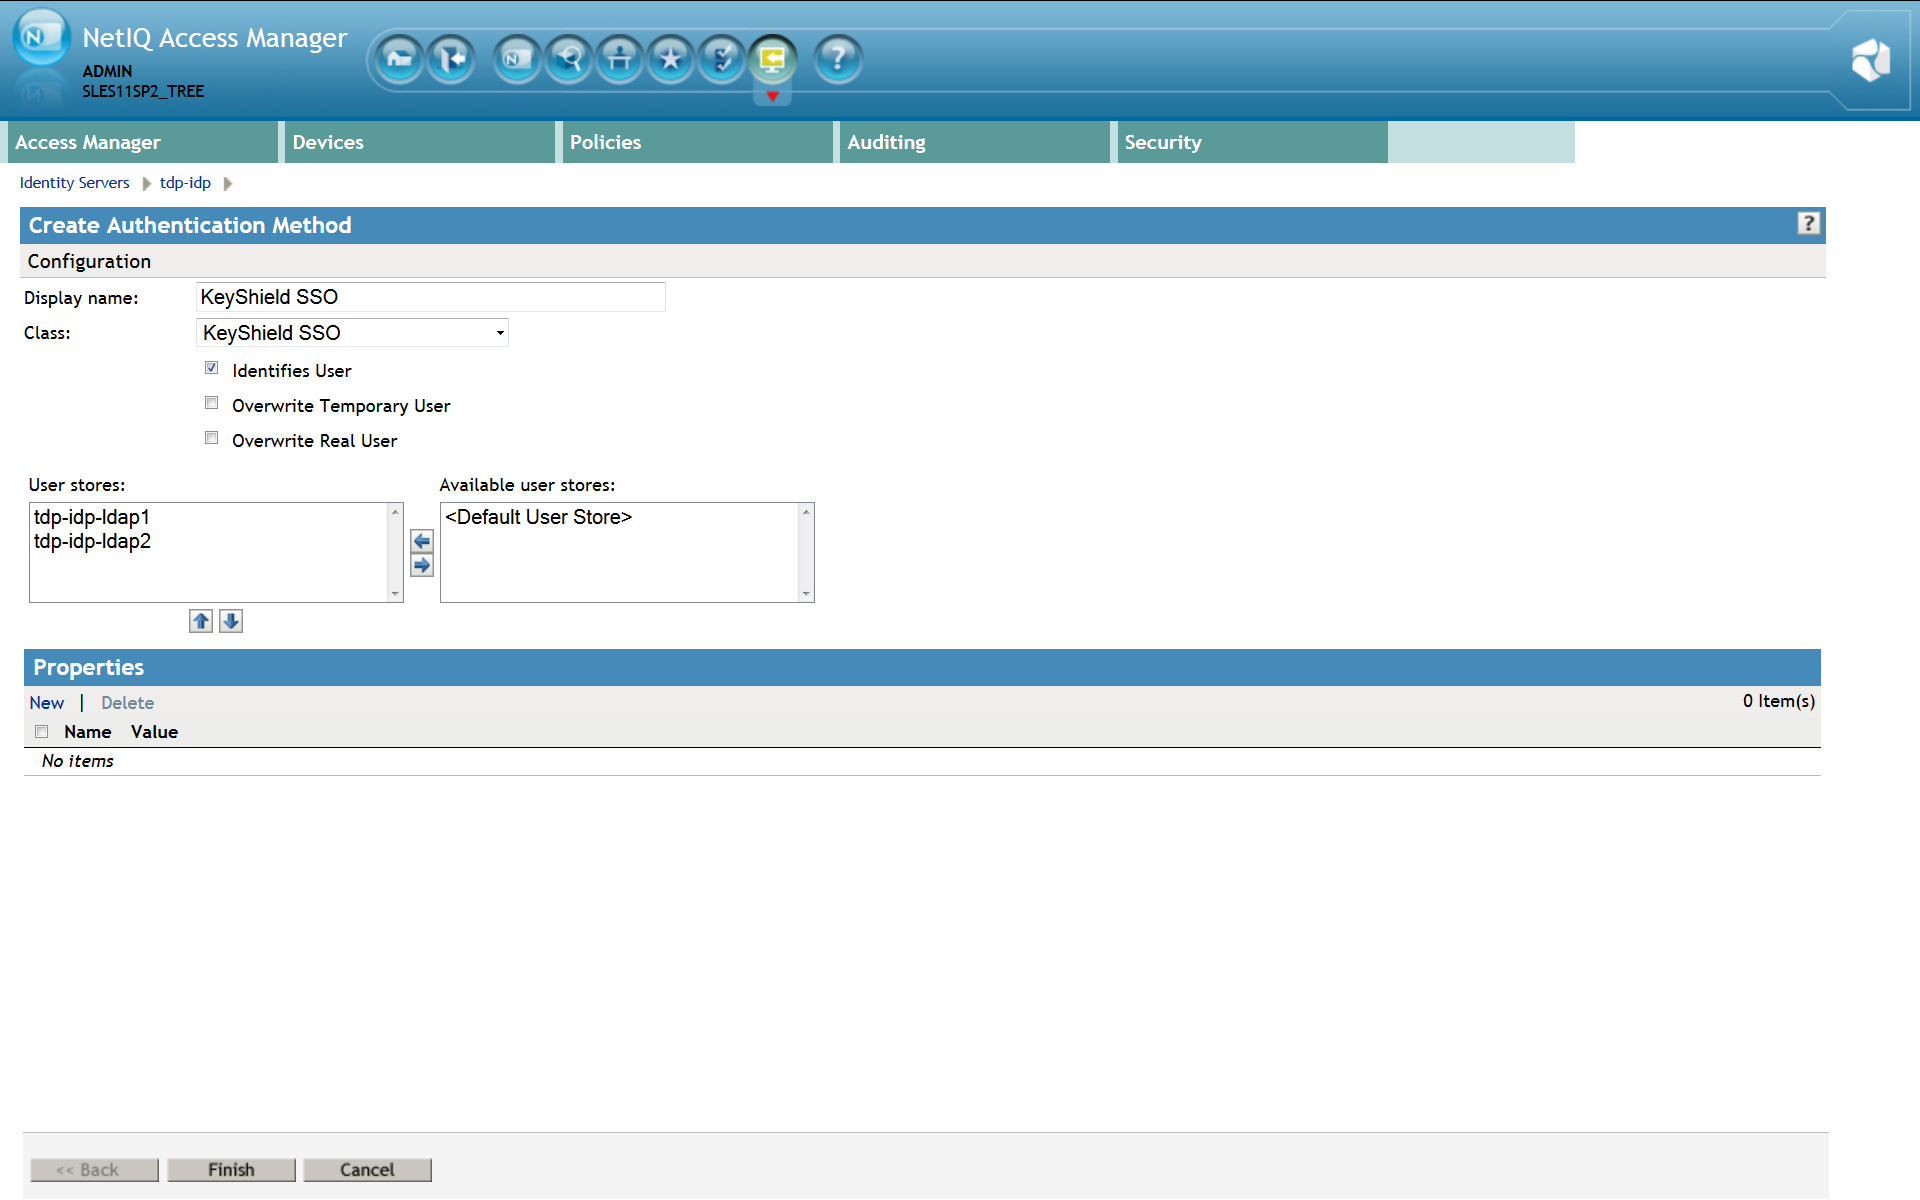
Please note: For detailed description refer to the Identity Server Guide section 3.3 Configuring Authentication Methods. Now the new authentication method, instance of the KeyShield SSO authentication class, has to be created. Make sure that Identifies User option is checked. (see the screen shot below) User stores must be selected here again.
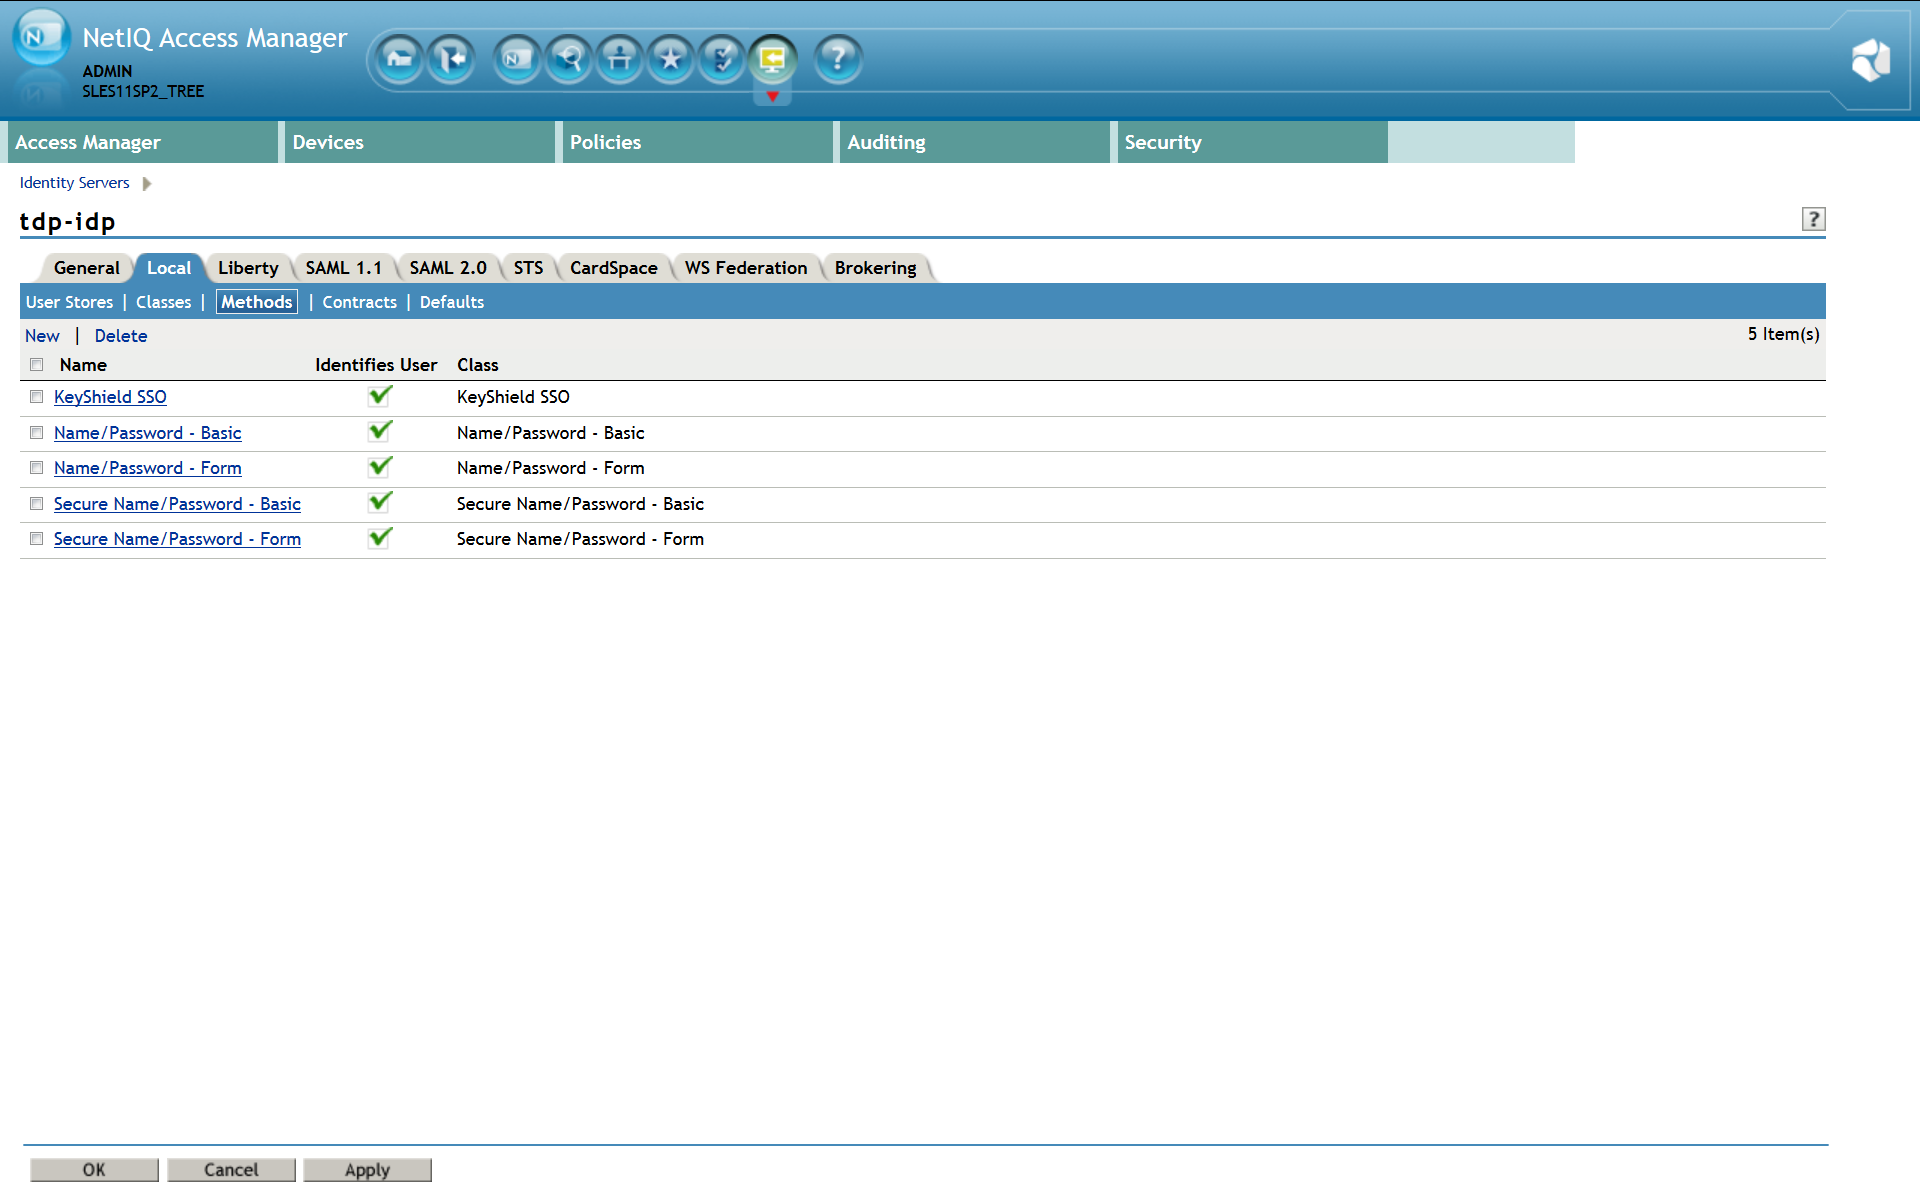
Now confirm creation of the new authentication method and it appears in the list – see the screen shot below.
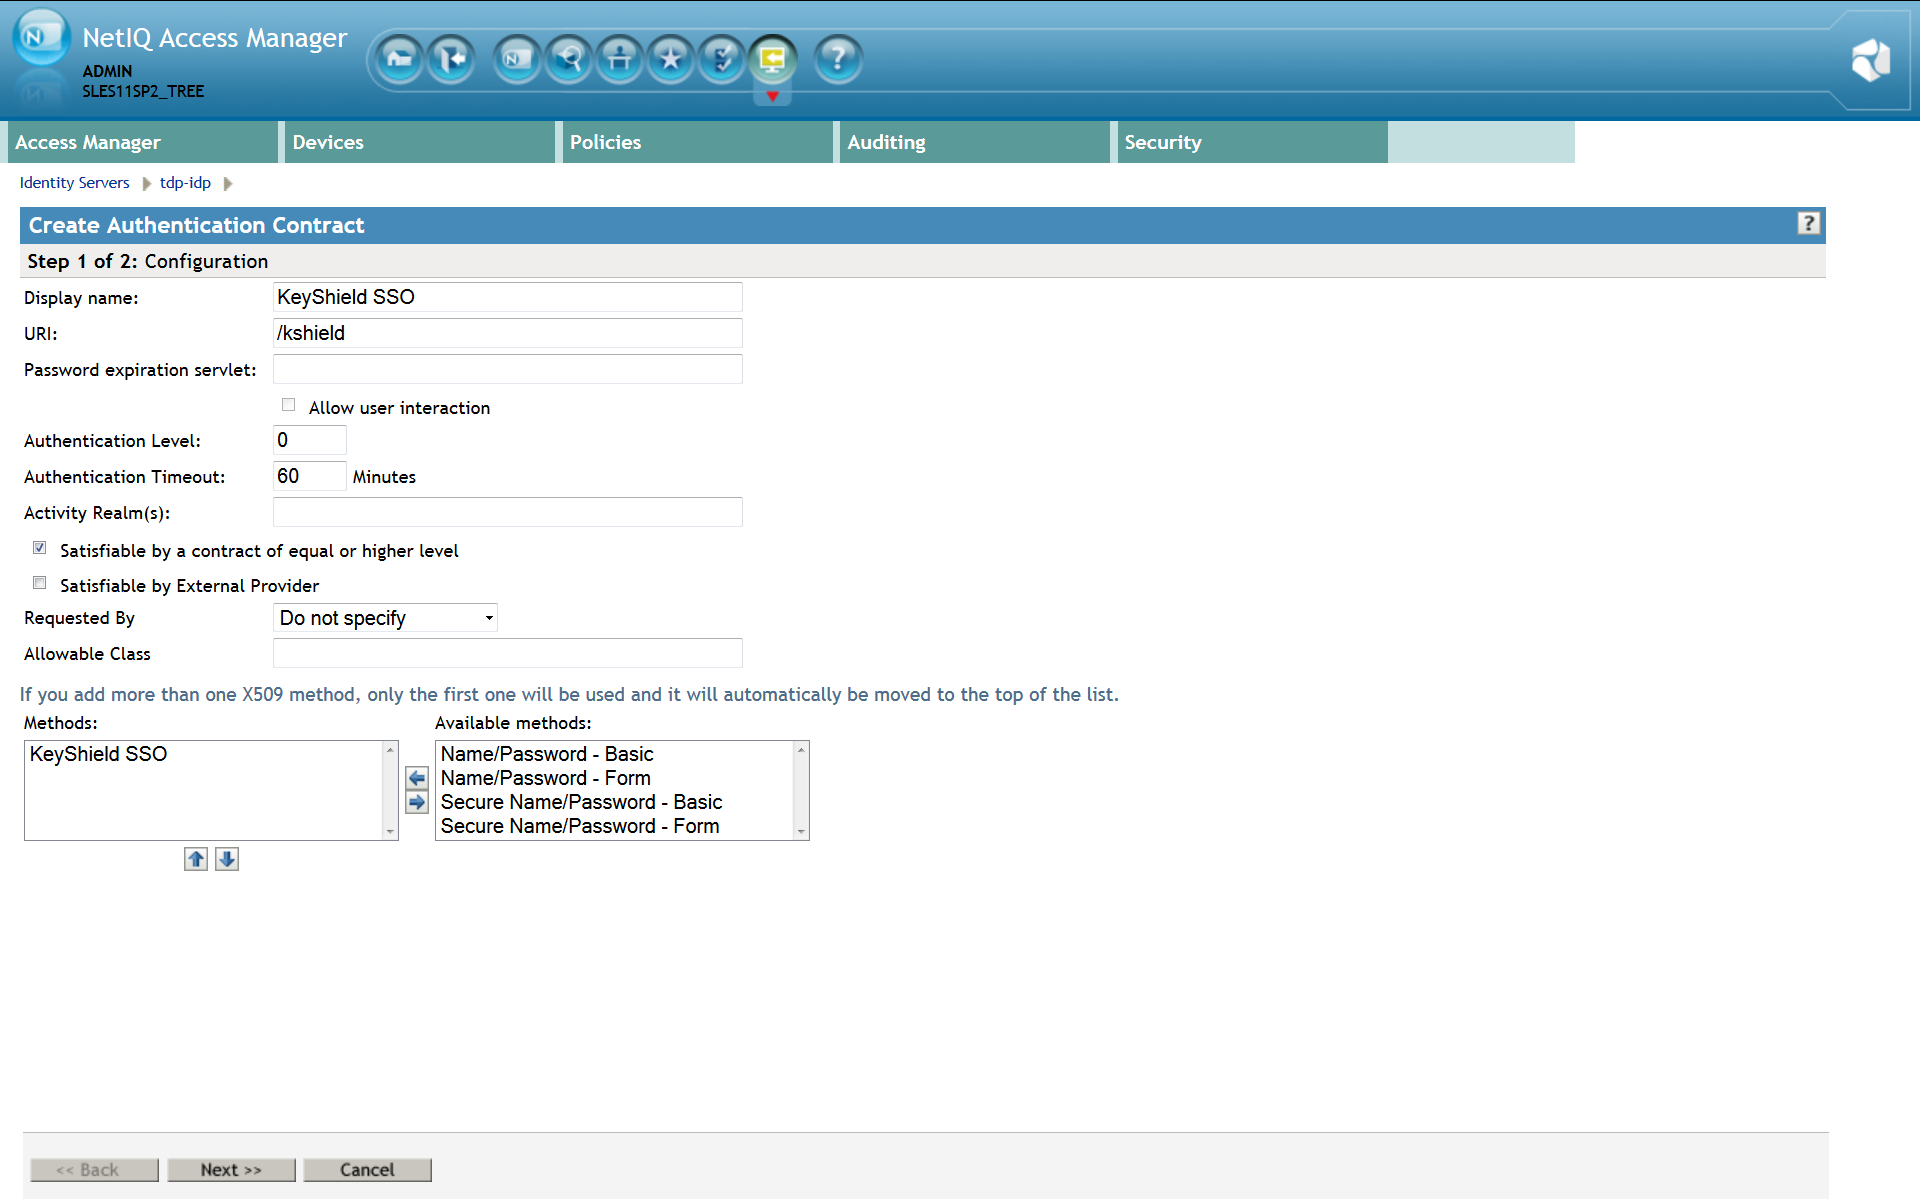
4. Define authentication contract
Please note: For detailed description refer to the Identity Server Guide section 3.4 Configuring Authentication Contracts. Also a new Authentication Contract has to be created. This contract will use KeyShield SSO authentication method. The URI attribute must be set as well. The value is not used but it must be unique within the NAM instance. It’s recommended to use just /kshield
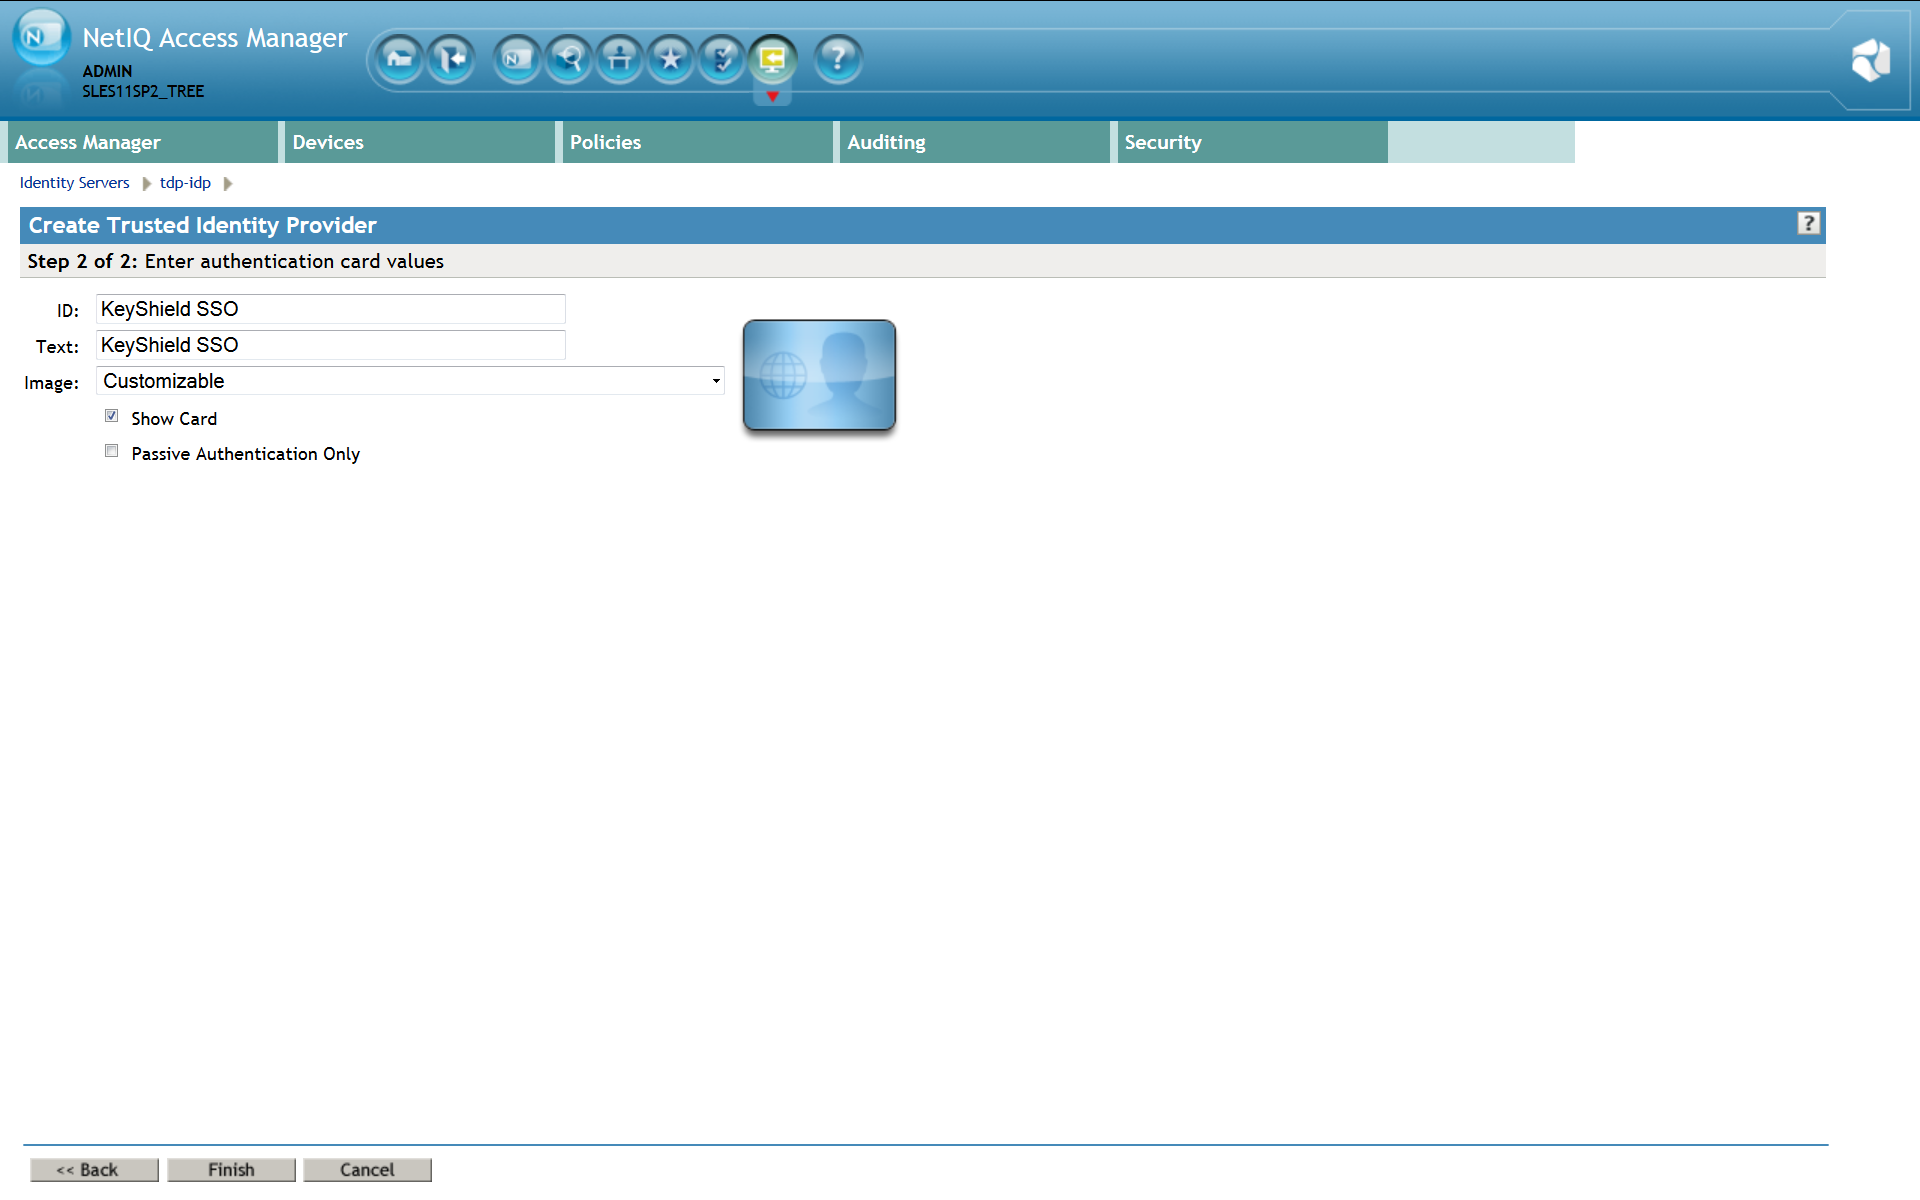
For a proper function of the Authentication contract, authentication card must be configured incl. A picture. Please use Customizable and it’s picture or upload whatever you want.
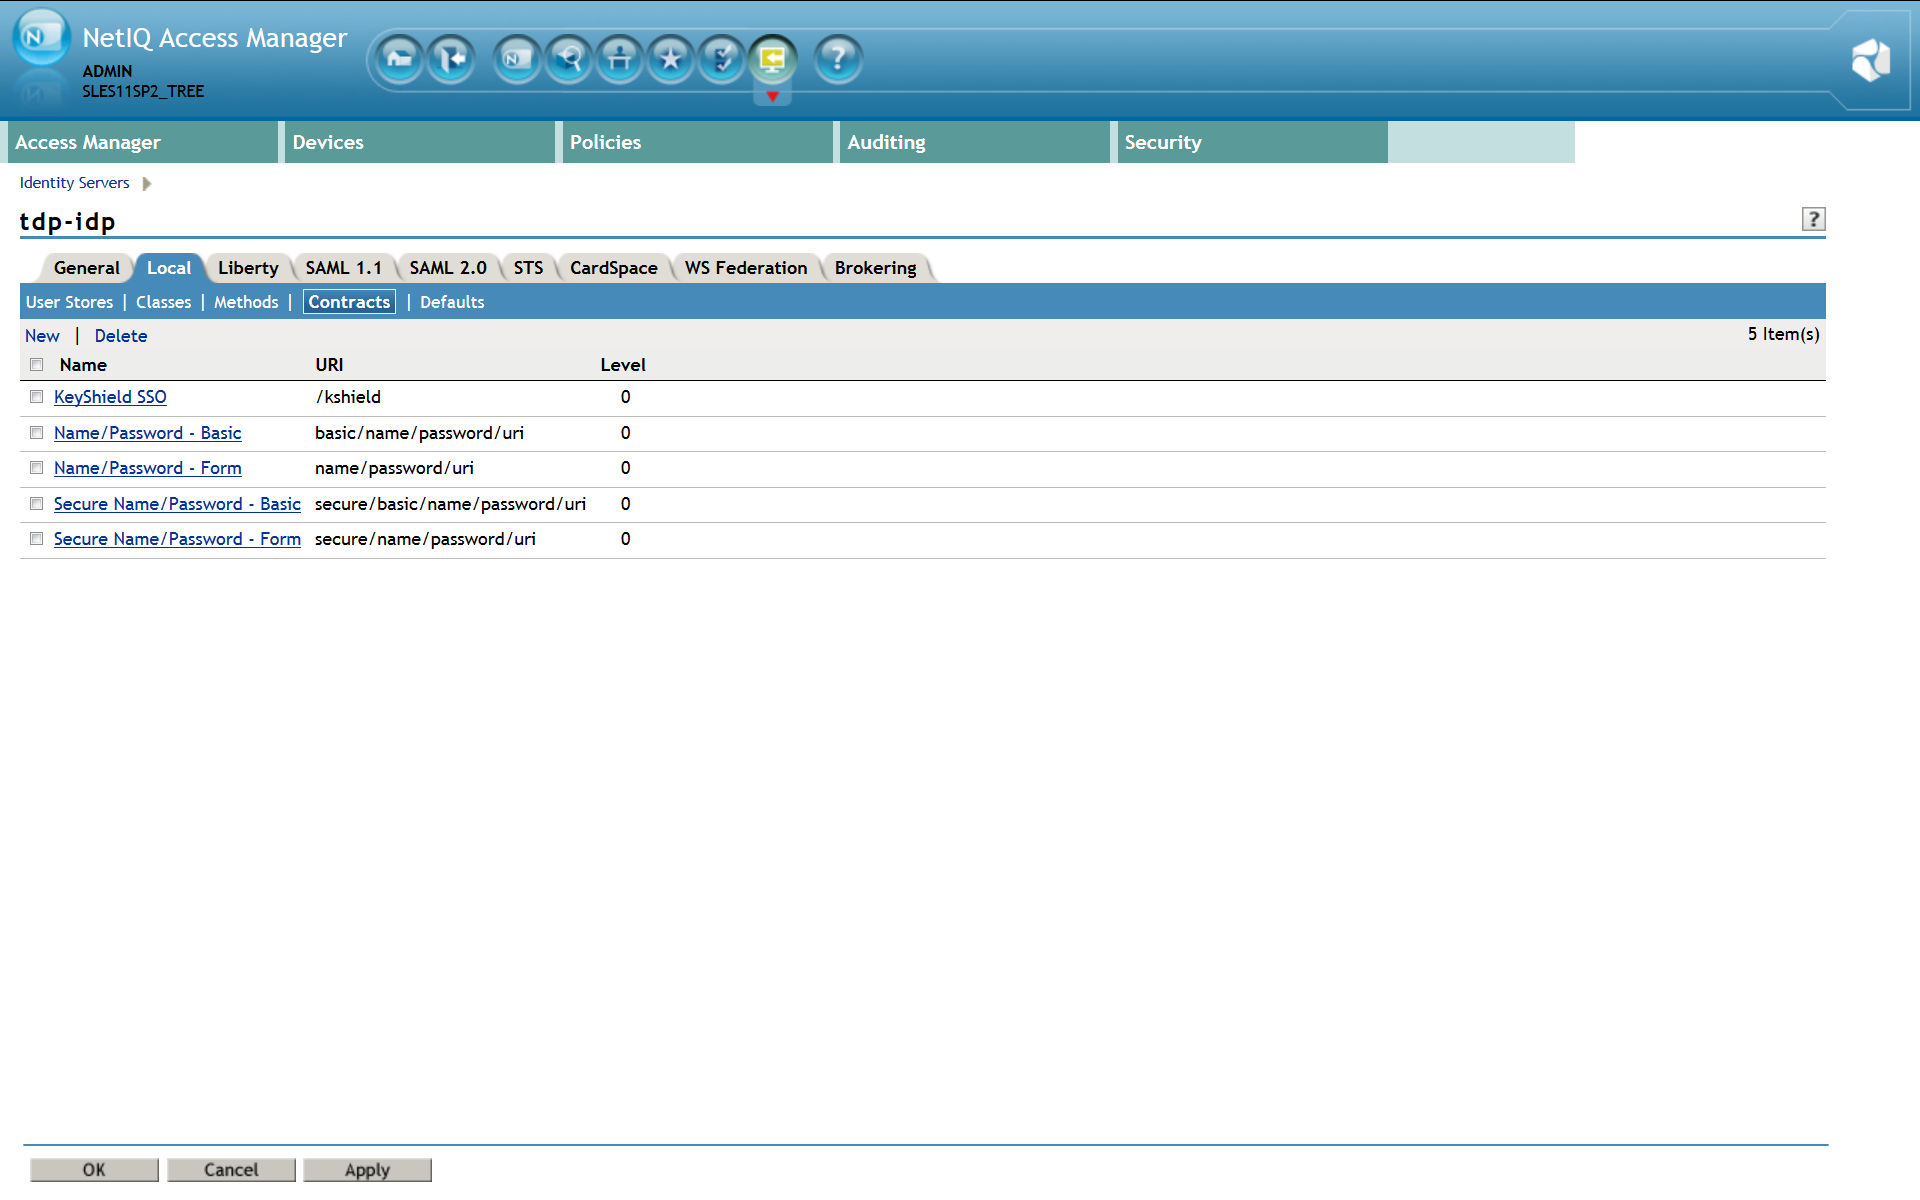
Now confirm creation of the new authentication contract and it appears in the list – see the screen shot below.
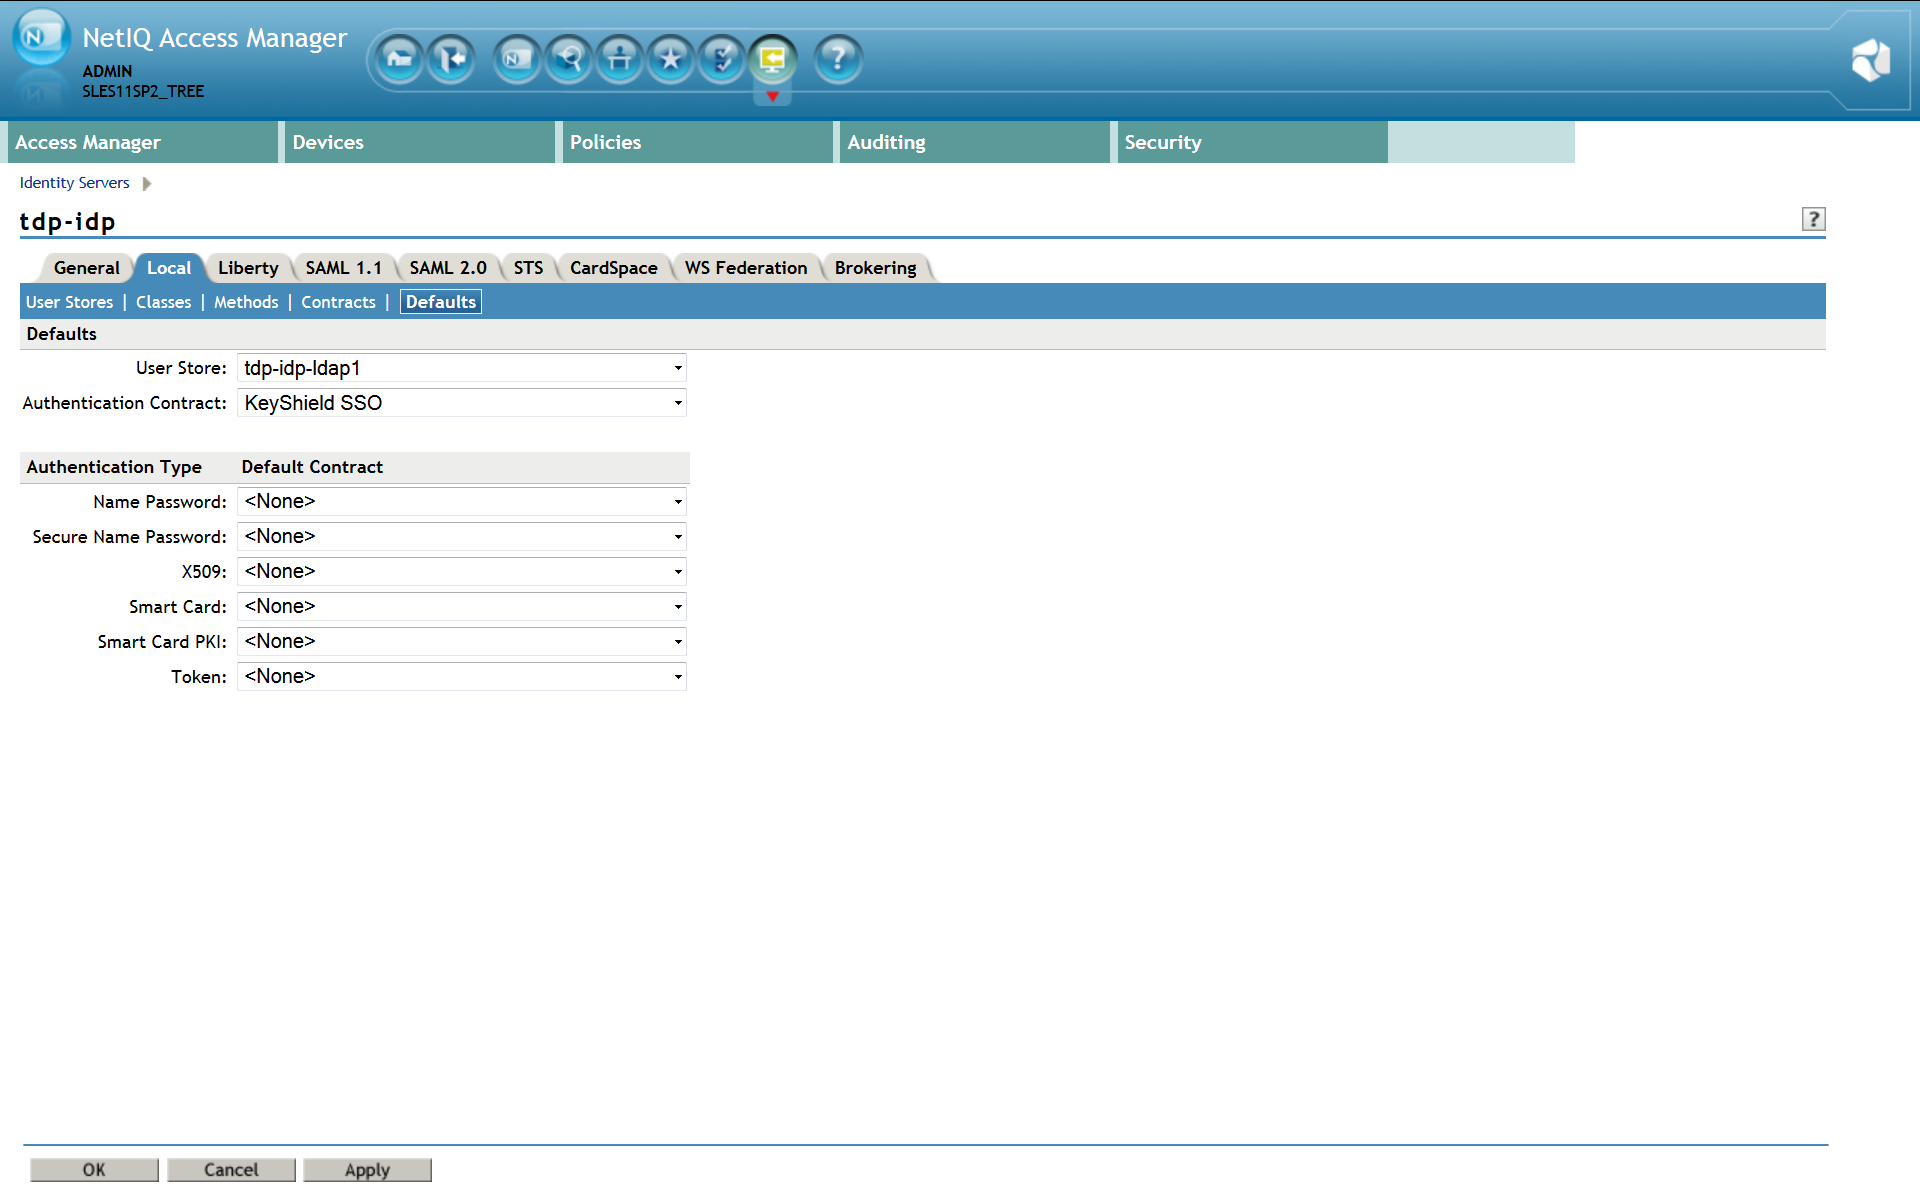
5. Specify authentication defaults
Please note: For detailed description refer to the Identity Server Guide section 3.5 Specifying Authentication Defaults. The SSO authentication must be used as the first authentication contract, otherwise the user will be asked for username and password, certificate, card, etc Please refer to the screen shot below for a proper SSO configuration – KeyShield SSO contract must be set as default. Please note: if this SSO authentication fails (for example because the user is not authenticated to the KeyShield SSO server), the control is passed to the fallback Authentication class configured as a property of the KeyShield SSO Authentication Class.
6. Restart Identity server
Now restart Identity Server to apply changes. Now you can use the KeyShield SSO authentication with your NetIQ Access Manager.